 GitBucket
CLion Project Configuration
CLion can integrate with CMake to provide code comprehension features.
After opening the minerva repository in CLion as a new project, the "Open Project Wizard" window will open, from here set the following fields:
(Assuming you use Ninja as the build system and configured the CMake build directory to Build/x86_64)
Build type: Default
_CMake will complain with any other build type, make sure to use
Defaultso thatCMAKE_BUILD_TYPEis empty in theBuild/x86_64/CMakeCache.txtfile._
CMake Options:
-DCMAKE_PREFIX_PATH=$CMakeProjectDir$/Build/lagom-install
-DCMAKE_TOOLCHAIN_FILE=$CMakeProjectDir$/Build/x86_64/CMakeToolchain.txt
-DMINERVA_ARCH=x86_64
-DMINERVA_CACHE_DIR=$CMakeProjectDir$/Build/caches
-GNinja
CLion will complain that the toolchain file doesn't exist yet, if you haven't
cmakefor the SuperBuild step before. The SuperBuild configure step creates the Toolchain file. To re-create the file after blasting your build directory, runcmake -GNinja -S Meta/CMake/Superbuild -B Build/superbuild-x86_64from the top level in a terminal, or simply run./Meta/minerva.sh run
Build Directory: Build/x86_64
If you have not built the Toolchain at this point, please do so:
./Toolchain/BuildGNU.sh_If you have not built host tools from Lagom at this point, please do so:
./Meta/minerva.sh buildorninja -C Build/superbuild-x86_64after runningcmake -GNinja -S Meta/CMake/Superbuild -B Build/superbuild-x86_64_
If you already have the project open, you can go to File -> Settings -> Build, Execution, Deployment -> CMake to find these options.
Excluding Build Artifacts
Source files are copied to the Build directory during the build, if you do not exclude them from CLion indexing they will show up in search results. This is often confusing, unintuitive, and can result in you losing changes you have made to files. To exclude these files navigate to the Project tool window, right-click the Build folder and select Mark Directory as | Excluded. If you want to exclude Toolchain files as well, follow the same procedure with the following paths:
Toolchain/LocalToolchain/TarballsToolchain/Build
Include headers and source files for code insight
To get proper code insight mark the folders AK, Kernel and Userland by right-clicking on them and selecting Mark Directory as | Project Sources and Headers.
A symptom of this not being configured correctly is CLion giving a warning for every single file:
The file does not belong to any project target, code insight features might not work properly.
Code Generation Settings
To make code generated by CLion match the Minerva coding style, import the CLionCodeStyleSettings.xml from this directory as code style scheme via Settings -> Editor -> Code Style -> C/C++ -> Scheme -> Cog icon -> Import Scheme...
Quick switching between Kernel and Userland targets
In order to let CLion know what kind of code you're currently working on (Kernel / Userland) to make sure it parses and displays the correct half of statements like this:
#ifdef KERNEL
...
#else
...
#endif
You need to add build configurations for each:
Click on one of the buttons below (top right of the IDE) - If you have the second one, press Edit Configurations after the dropdown box opens, then press CTRL+A to select the 1000s of automatically generated targets, and then press Delete to remove them.
Then press the + button to add a new configuration, select CMake Application, name the configuration Kernel, set the target to Kernel (typing while the dropdown box is open searches), and then repeat the process one more time, this time with the name being Userland and the target being true.
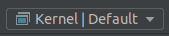
Finally, to quickly switch between the two different contexts, simply click the Kernel | Default / Userland | Default button to switch.
Notes for WSL Users
Toolchain
If the minerva directory is on the WSL filesystem you need to configure the CLion toolchain to be WSL. To set that up go to File->Settings->Build, Execution, Deployment->Toolchains and click on the + icon, then select WSL. In Toolset select the distribution you have the minerva directory on.
Terminal
It is possible to set the embedded terminal in CLion to the one that your WSL distribution provides. This way you can build and run minerva without leaving the IDE. Note that following will only help if you don't use an X-window server to access qemu. It is possible to install qemu natively on Windows and allow WSL to use it instead of installing qemu first on (wsl) linux and then use X server to launch minerva inside of it. Check the updated manual here.
-
Locate the terminal emulator for your linux distribution. Open CMD with elevated privileges and cd to
C:/Program Files/WindowsApps/. The directory is usually hidden and requires additional privileges. You should be able to cd as administrator.dirand look for your distribution in directory names. In case of Ubuntu, it starts withCanonicalGroupLimited.Ubuntu20.04onWindows_2004.2020.424.0_x64. cd to it. The directory should contain the shell executable. In my case it's namedubuntu2004.exe. Copyabsolute/path/to/ubuntu2004.exe. -
Go to your IDE settings:
File->Settings->Tools->Terminaland paste the path you just copied toshell path. Click OK. -
Close CLion and restart.
The default IDE terminal should now be changed to WSL, and now you can run CLion/run.sh. You may also want to copy minerva/Meta/CLion/run.sh to your project directory and run it from there, so that you don't have to fight with git every time you modify the script.